
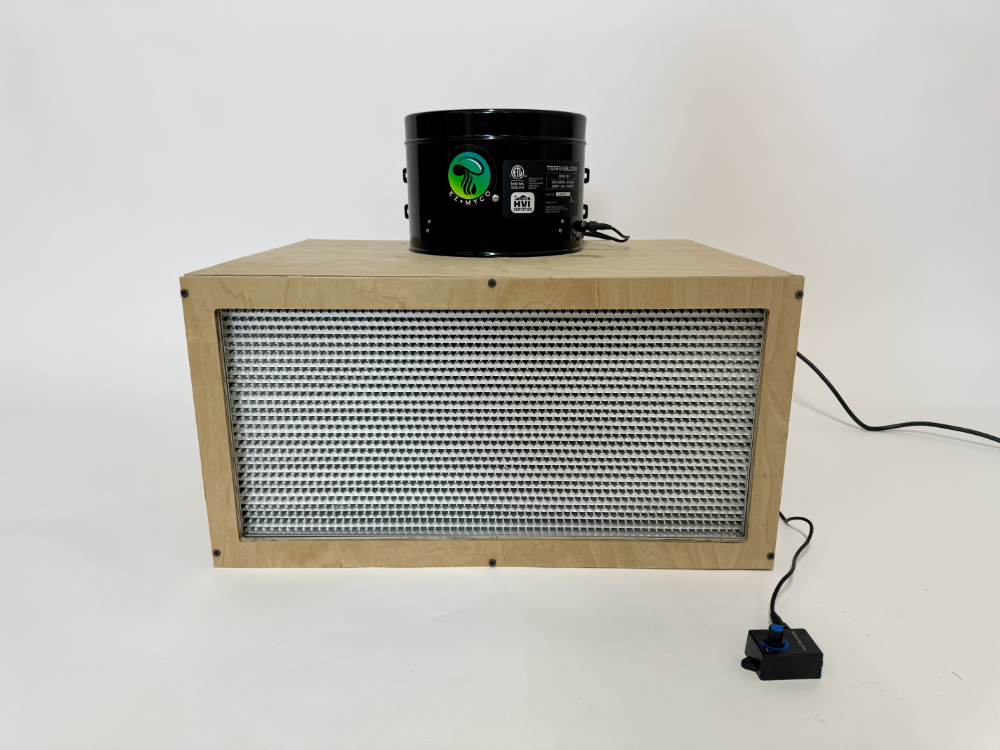
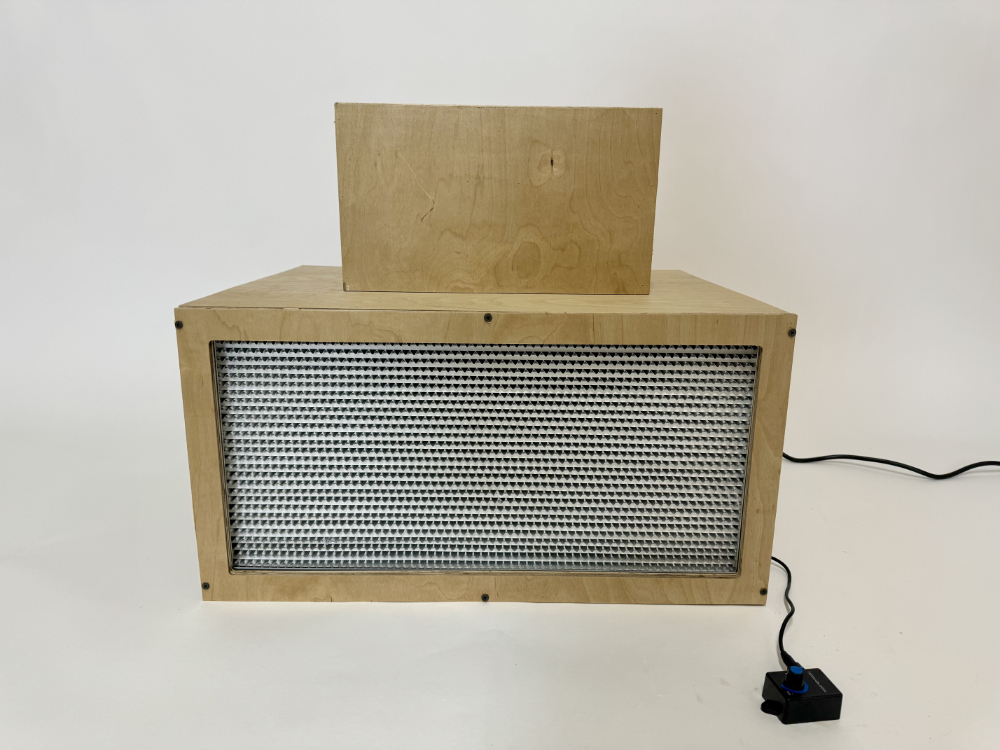
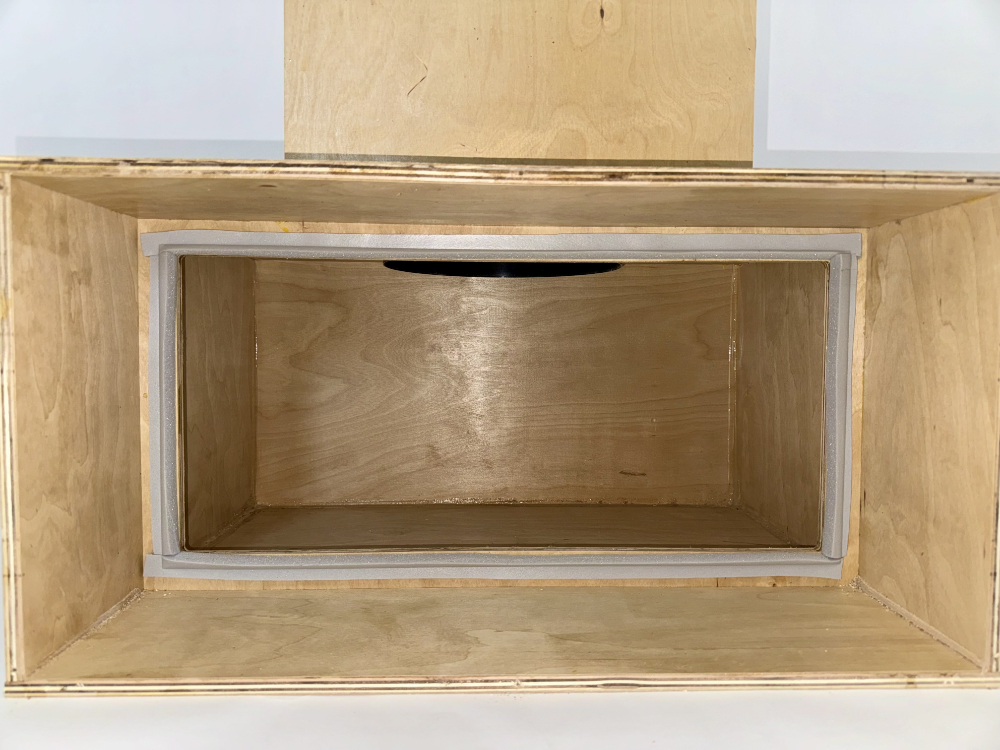
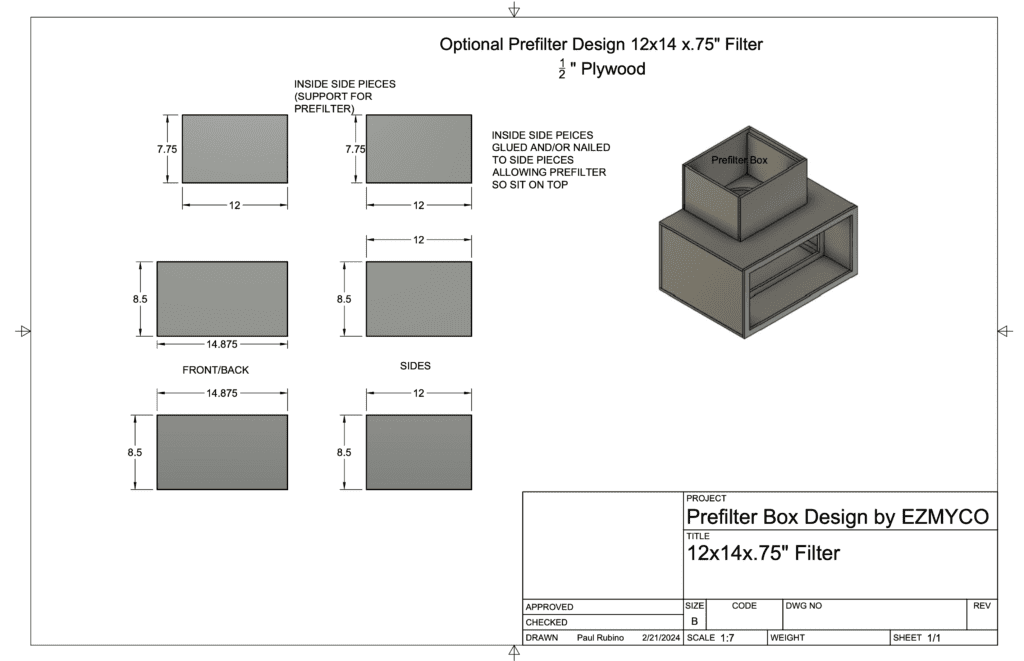
Above is our most recent DIY Laminar Flow Hood Design. This is the same unit we used in our youtube video demonstrating laminar flow with our fog test. Below are free plans to build your own. This design incorporates a variable speed fan instead of a squirrel cage blower. The adjustability of the the dial from 0-100 is a tremendous benefit in achieving laminar flow. It is also nice to be able adjust fan speed depending on what you are using the flow hood for. Below is the same unit with an optional pre-filter. Before you build your own, you will need wood glue, clamps (or weights), silicone, a brad nailer or screw gun, and foam or weather stripping for assembly. Cuts can be made on a single sheet of 4×8′ 1/2″ plywood with room to spare.
Below are design plans for mycologists to build their own 12×24″ laminar flow hoods. If you know your way around a piece of plywood, it is not a difficult process. If you unexperienced with wood work, you may consider ordering a kit with all the pieces already cut by our CNC machine or a complete unit. A benefit to our kits and complete units is that we use dado cuts so all of the pieces lined up perfectly and sit nice and snug with little to no effort.
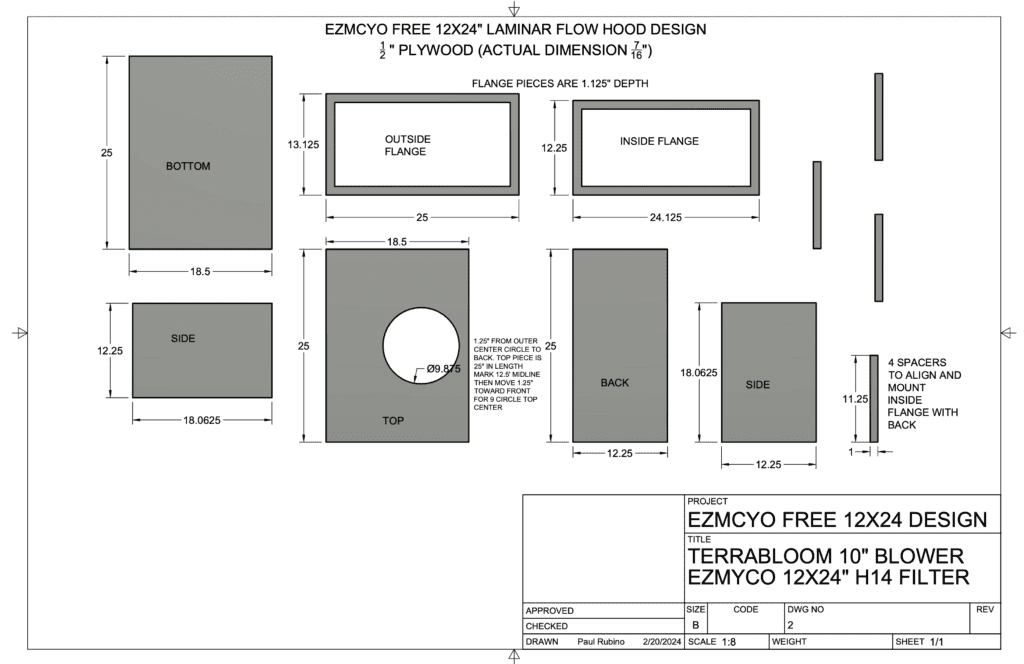
Design notes before you get started: The flange pieces are drawn up as one piece. We cut them as one piece on our machine. If you are making one of these at home you will likely cut this out of four pieces and miter them together. You do not have to use half inch ply for the flange pieces. We recommend hardwood if you plan to miter them together. On the inside if you go with something thicker than a half inch (for example 3/4 hardwood) you will need to adjust your spacer pieces. This will make more sense when you review the drawings. If you are handy with a jig saw you can cut these flanges out of 1/2″ plywood and keep them one pieces.
The average person may struggle to cut a perfect circle that is 9.875″ in diameter. You will need a circle cutting jig or some kind of other solution. For now I am leaving up the original 12×24″ design which has had a fair amount of use based on phone calls and emails from customers. You may find it to be a littler easier to cut the blower hole and the blower is less expensive. You are always welcome to reach out to us with questions.
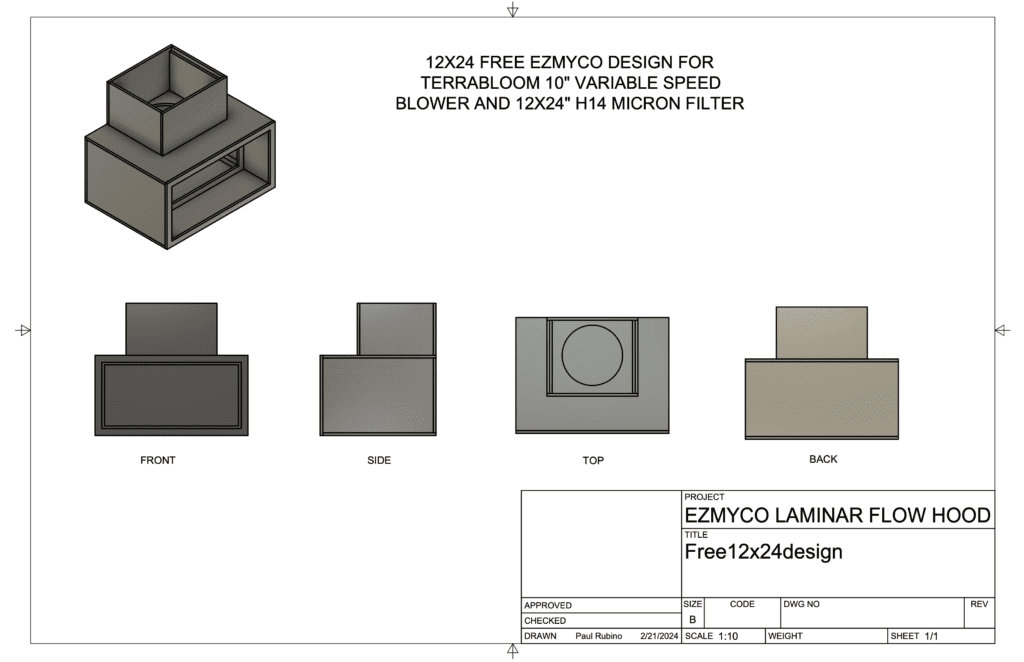
This design uses the following items:
Terrabloom 10″ variable speed fan
ezmyco 12x24x6″ H14 micron filter
You will need wood glue, clamps (or weights), silicone, a brad nailer or screw gun, and foam or weather stripping for assembly. Cuts can be made on a single sheet of 4×8′ 1/2″ plywood with room to spare.