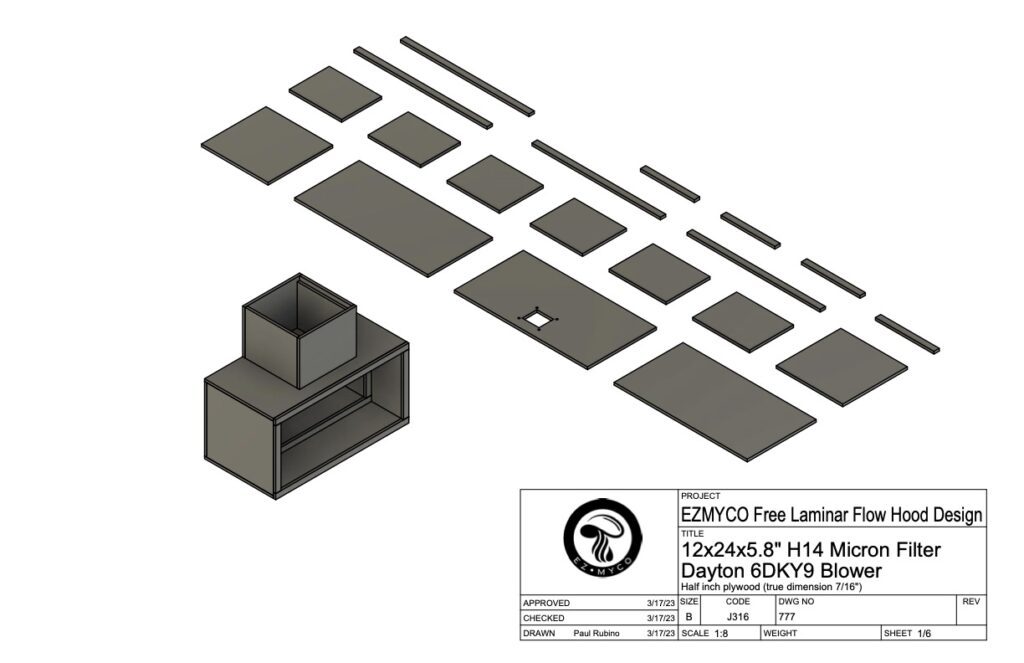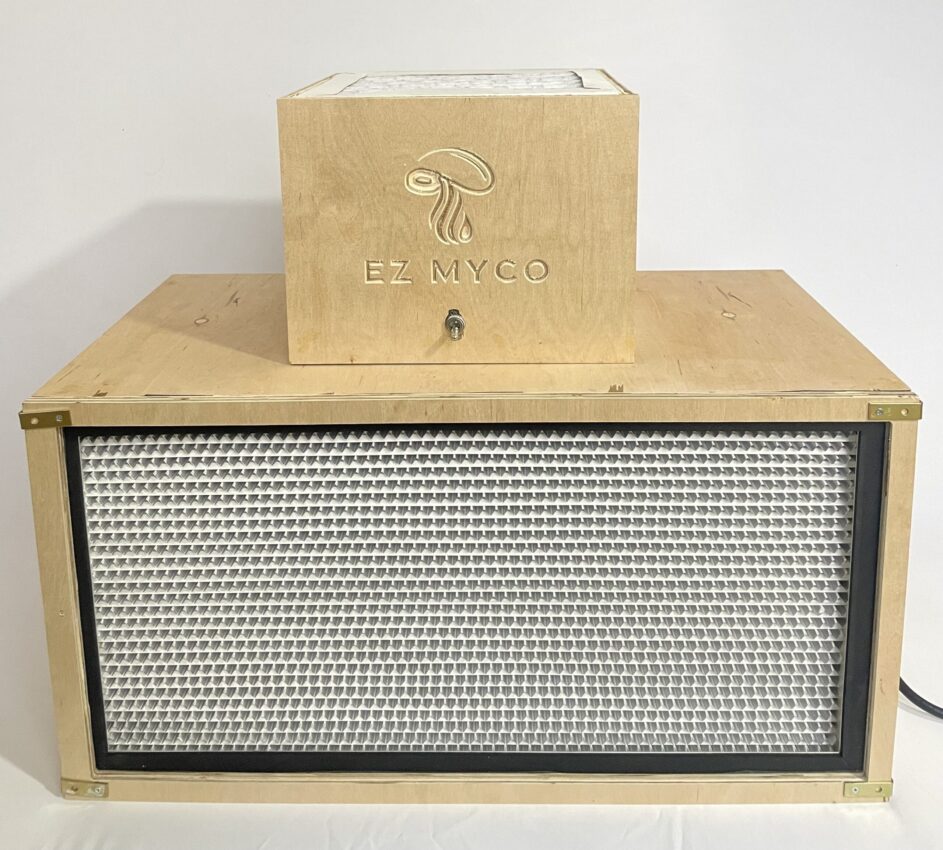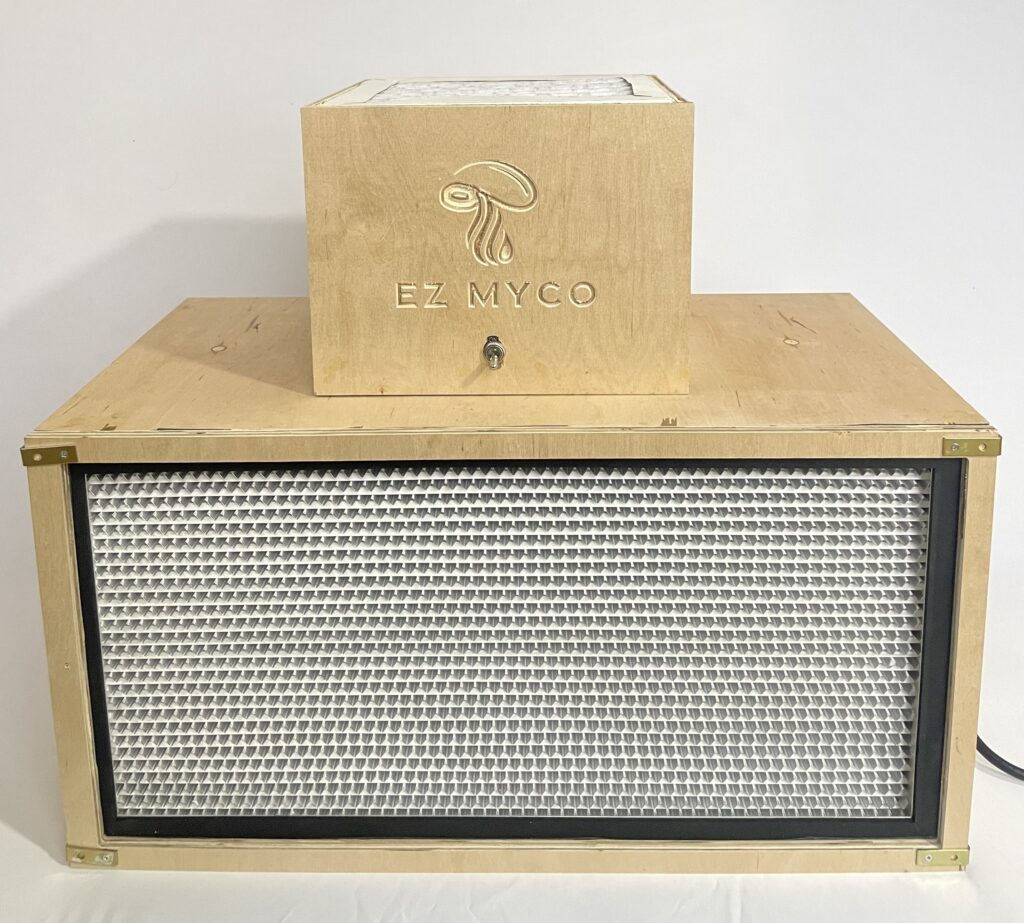
Need help with figuring out How to build your own laminar flow hood? Building your own laminar flow hood can be difficult. The preliminary research is enough to make most people give up. What filter should I use? How do I match it up with the right blower? Do I need to use a prefilter? These are all important questions and there are some excellent resources online to get your answers. That being said it could still be easier.
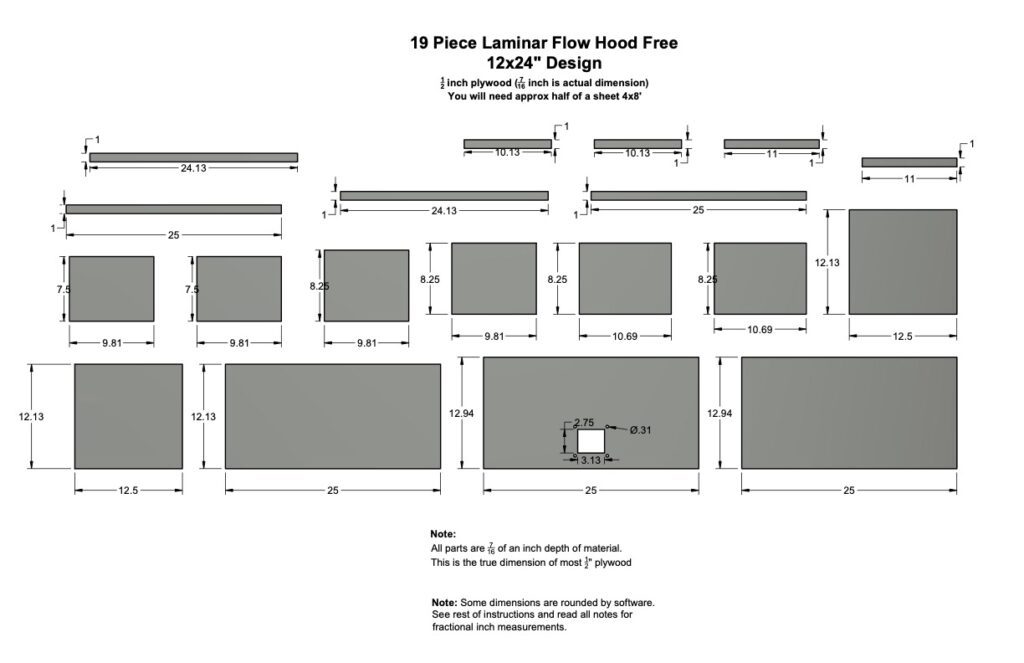
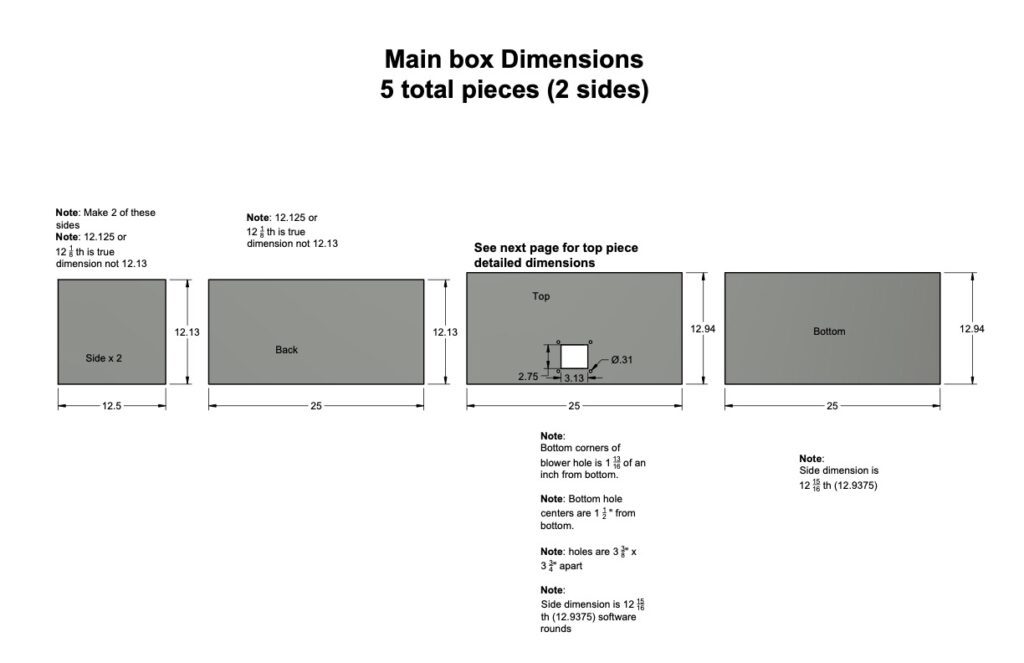
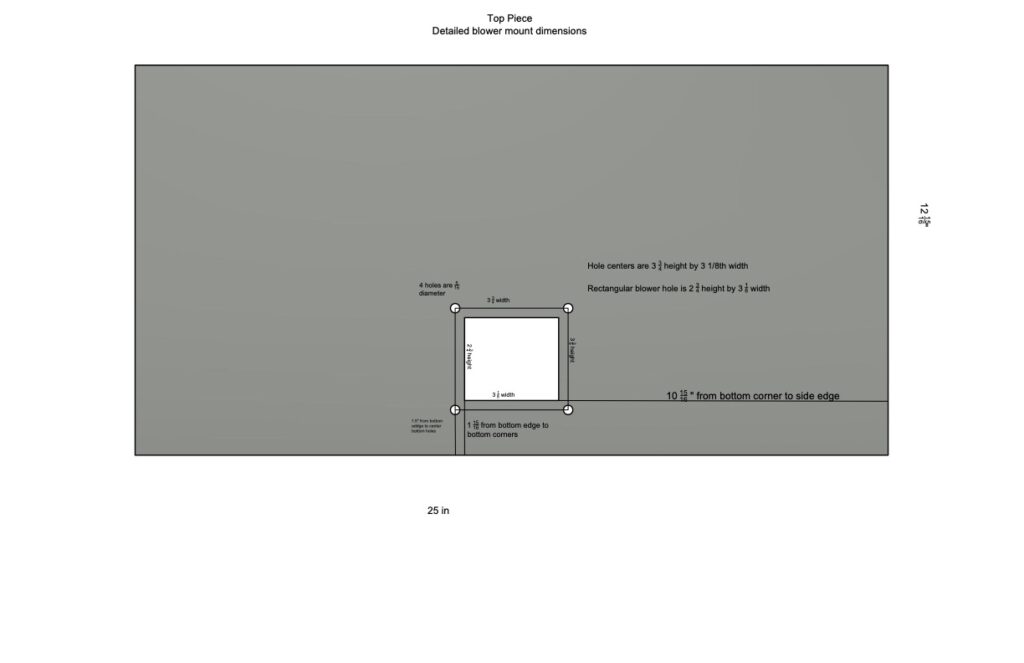
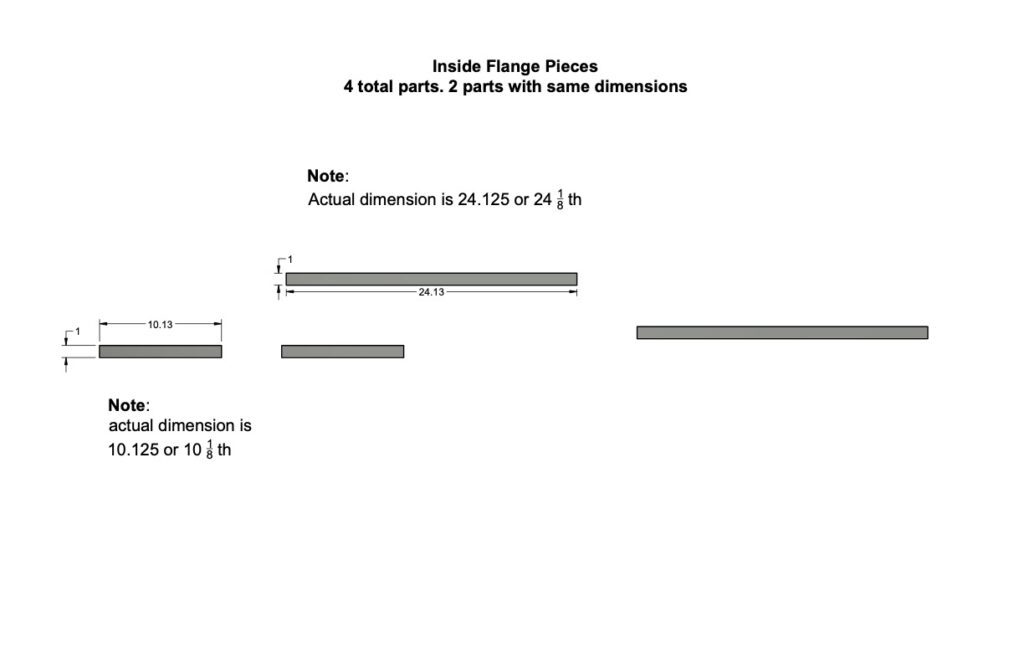
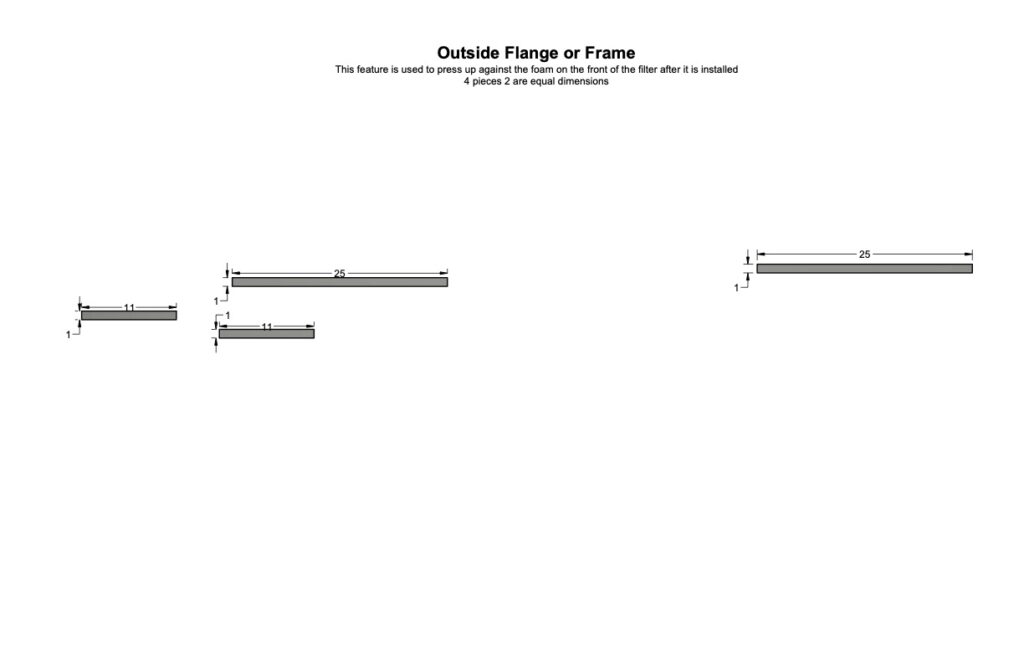
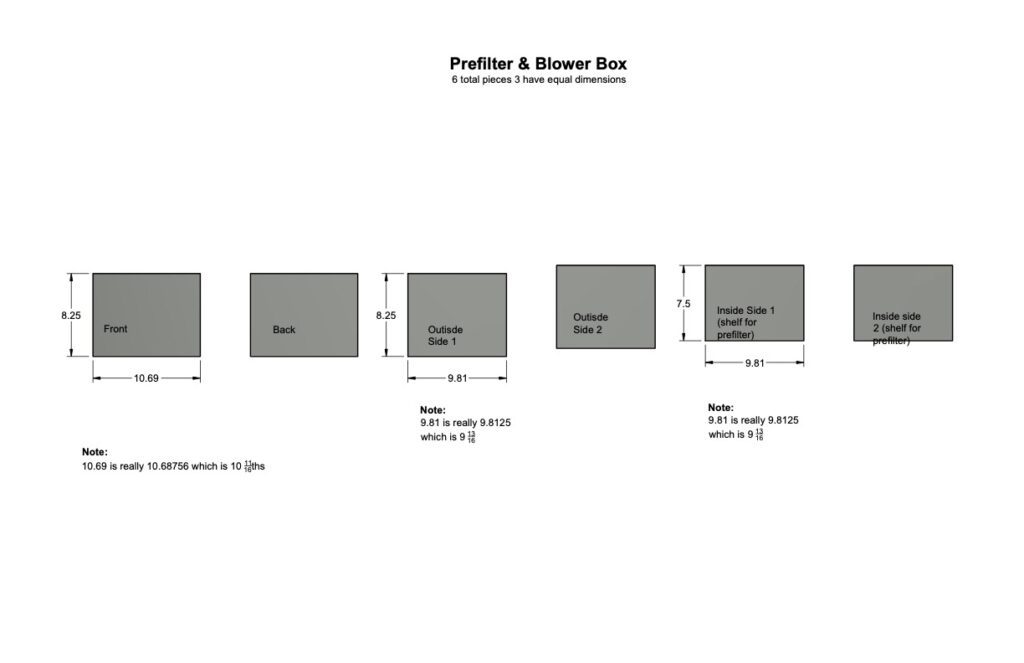
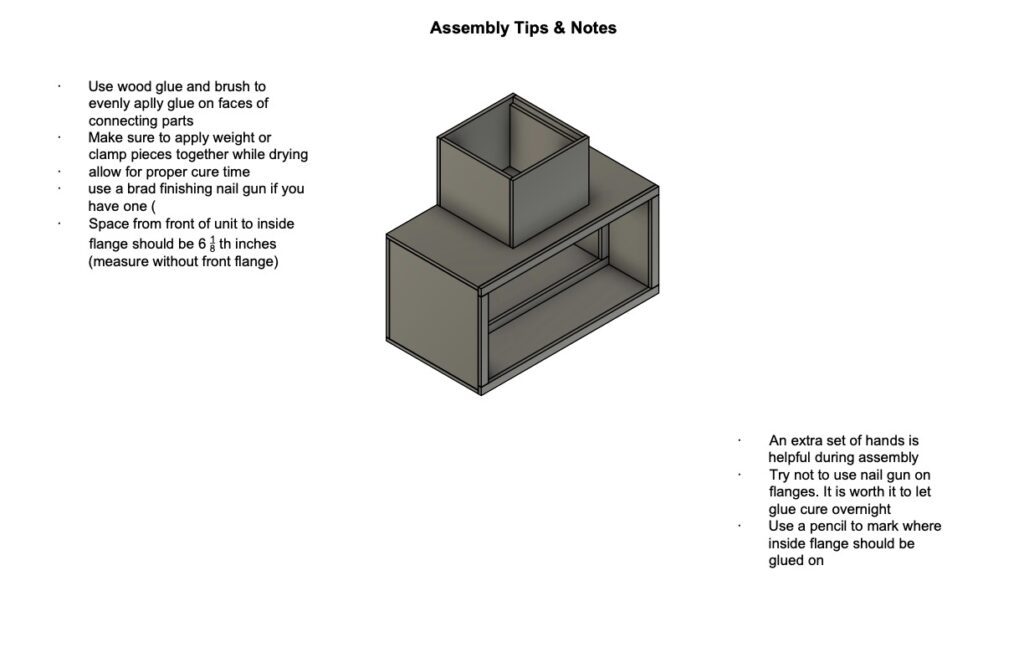
My name is Paul, Manager of Ezmyco. I took some time to create a guide for the mycologists who would like to build their own laminar flow hood and hopefully save some money. This guide is primarily going to provide patterns for cutting 19 pieces. If you are not an engineer or carpenter, building a box isn’t as easy as it sounds. Dimensions need to be correct and material thickness accounted for. I have included some assembly tips and plan on releasing more information including a video in the near future, but remember the focus will be on the cut patterns. I will allow comments for sharing info or if you want to completely roast me for grammar or my presentation of this free information.
Laminar Flow Hood Build Advice and Information
I should mention not everyone will find this project easy. There is a reason why this size flow hood costs over $1000 when made correctly. When I was young a good carpenter told me “measure twice cut once” another phrase that comes to mind is “use the right tools for the job” This one applies to the flow hood for your lab work and the correct saws and power tools to efficiently build it!
See links below to necessary elements to complete this design. My design does not include a hole for your power feed to the blower. You can simply drill one after assembly. I hope this information is helps you grow your business and your favorite fungi.
- H14 12x24x5.8″ Micron filter (Ezmyco offers these on this site or you can find from a few other providers)
- Dayton 6DK9 Blower
- 10x10x1″ air filter (true dimensions are 9.75×9.75 x .75″
- 4×8 sheet of half inch plywood (true dimensions is 7/16 of an inch.
- L brackets fro securing front flange to filter
- Weather stripping foam for inside flange
- 1/4 -20 1″ hex bolts 1/4 – 20 nuts (local hardware store)
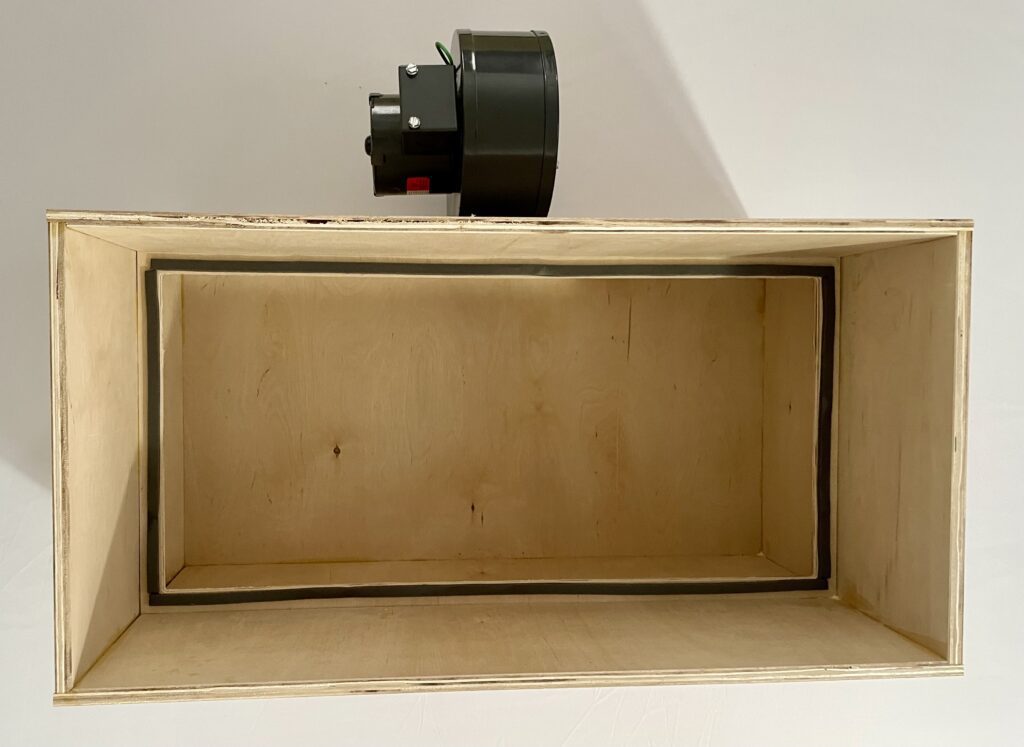
Adding weather stripping to the inside flange will help achieve an airtight seal for your filter.
It is easier to install the blower with 1/4 – 20 1″ hex bolts and 1/4 -20 nuts before installing prefilter.
Laminar Flow Hood Design Patterns
